very great shot starts with one simple decision: which way do I hold the camera? It sounds small, but it shapes everything. Your composition. Your story. The emotion your viewer feels. Whether you’re shooting wide open fields or a person’s face, understanding landscape vs portrait photography is the foundation of stronger images. It’s not just about camera orientation but also about how you see the world through your lens.
This guide breaks down both styles clearly. You’ll learn what sets them apart, the best camera settings for each, and which lenses give you the sharpest, most beautiful results. We’ll also show you how Sigma lenses trusted by professionals worldwide can elevate both types of photography. Whether you’re a beginner or an experienced shooter, this guide will help you make smarter choices behind the camera. To begin with, let’s get started.
What Is Landscape Photography?
Landscape photography is all about capturing the world around you. Think rolling mountains, golden sunsets, misty forests, and endless coastlines. The camera is held horizontally, creating a wide frame that pulls the viewer into the scene. It’s one of the oldest and most loved forms of photography. The horizontal frame works perfectly because our eyes naturally scan from left to right. As a result, this makes landscape images feel cinematic and immersive.
The goal is simply to make the viewer feel like they’re standing right there. Great landscape photography uses leading lines, natural light, and strong compositions to tell a story without a single word. Patience and timing matter as much as gear. In fact, the best shots often happen at golden hour just after sunrise or before sunset when light is soft and warm.
When to Use Landscape Orientation
Use landscape orientation when your subject is wider than it is tall. It works best when the scene has strong horizontal elements: a long horizon, a wide river, or an expansive sky. Landscape orientation is also the right choice for group shots. It gives everyone room to breathe within the frame. It’s also ideal for architecture, street photography, and any situation where the environment is as important as the subject.
Additionally, if you’re shooting for websites, YouTube thumbnails, or desktop wallpapers, landscape framing fits naturally. Most screens are horizontal, so your image fills the display without awkward cropping.
Best Scenes for Landscape Photography
Not every outdoor shot demands a landscape frame, however, these scenes almost always look better in horizontal orientation:
- Mountain ranges and open valleys — capture the full scale of the landscape
- Ocean and beach scenes — show the meeting of sea and sky
- Golden hour sunsets or sunrises — highlight warm, natural lighting
- City skylines and wide urban views — show scale and architectural detail
- Forests and paths — use leading lines to guide the viewer’s eye
What Is Portrait Photography?
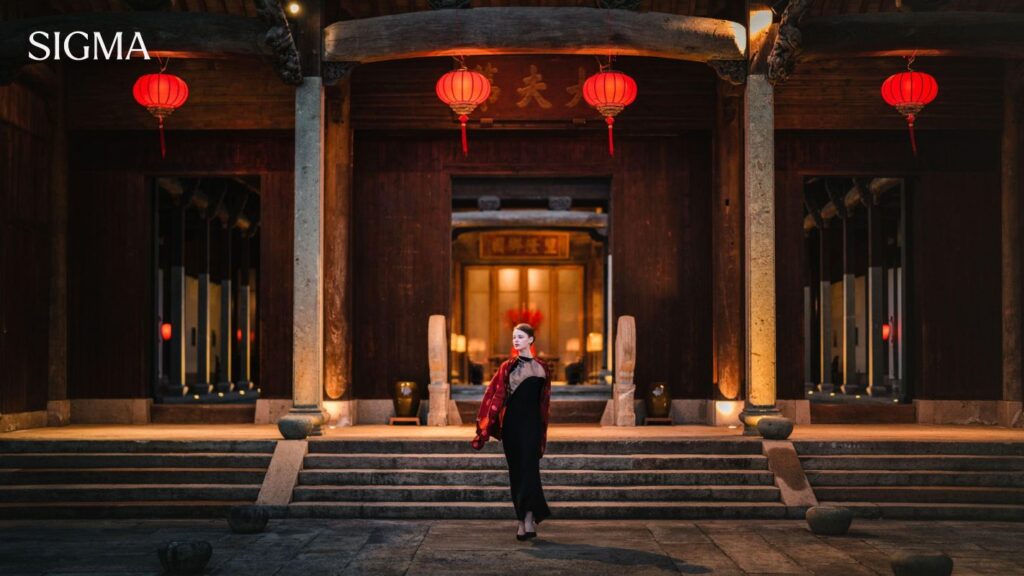
Portrait photography focuses on people. It’s about capturing expression, personality, and emotion. The camera is held vertically taller than it is wide which naturally suits the human body. A strong portrait picture does more than show a face. It reveals character. The vertical frame isolates the subject and removes distracting backgrounds, letting the viewer connect directly with the person in the image. Professional portrait photography uses shallow depth of field to blur the background, a technique called bokeh.
Therefore, this keeps the focus entirely on your subject. It’s why photographers use wide-aperture lenses like f/1.4 or f/1.8 for portraits. The result? Creamy, dreamy backgrounds with tack-sharp faces. Whether you’re shooting headshots, family portraits, or editorial fashion, vertical framing gives your subject the space and prominence they deserve in the frame.
When to Use Portrait Orientation
Use portrait orientation when your subject is taller than it is wide. It naturally suits individual people, standing figures, and tall architectural elements like towers or doorways. Portrait framing is also the go-to choice for social media content. Instagram and Pinterest are vertical-first platforms. Shooting vertically means your image fills the screen on mobile with no awkward white borders. Similarly, if you’re shooting book covers, magazine spreads, or mobile app visuals, portrait orientation is almost always the right call. It creates a natural visual hierarchy the eye moves from top to bottom, following the subject’s form.
Best Subjects for Portrait Photography
These subjects almost always look stronger in vertical (portrait) orientation:
- Individual headshots and professional profiles — focuses on the face and shoulders
- Fashion and editorial photography — shows full outfits clearly
- Wedding portraits — creates an intimate and formal feel
- Children and newborn photography — keeps the focus soft and personal
- Social media content — vertical images perform better on platforms like Instagram and TikTok
Portrait Photography vs Landscape Photography — Core Differences
If you’ve ever second-guessed which orientation to use, you’re not alone. Many photographers, even experienced ones, sometimes pause before deciding. The truth is, there’s no universal right answer. Instead, understanding the core differences between landscape vs portrait photography makes that decision much easier.
The table below gives you a quick, clear comparison of both styles across the most important factors:
| Feature | Portrait Photography | Landscape Photography |
| Frame | Vertical (tall) | Horizontal (wide) |
| Best For | People and close-up shots | Nature and wide scenes |
| Aspect Ratio | 2:3 or 4:5 | 3:2 or 16:9 |
| Depth of Field | Background is blurred | Everything is sharp |
| Aperture | f/1.4 – f/2.8 (for blur) | f/8 – f/16 (for sharpness) |
| ISO | 100–800 | 50–200 |
| Composition | Focus on the subject | Show the full scene |
| Lenses | 50mm, 85mm, 105mm | 14mm, 24mm, 35mm |
| Background | Blurry background (bokeh) | Clear and detailed background |
Best Camera Settings for Portrait and Landscape Photography
Getting the orientation right is only half the job. The settings you dial in on your camera make an enormous difference to the final image. Portrait photography and landscape photography each need a completely different approach to aperture, shutter speed, ISO, and focus. In other words, here’s the good news once you understand why these settings work for each style, it becomes second nature. You’ll stop guessing and start shooting with purpose.
Portrait Photography Settings
Portrait settings are built around one goal: make your subject sharp and the background soft. Here’s exactly how to set up your camera:
- Aperture (f/1.4 to f/2.8): Use a wide aperture to create a nice blurry background and make your subject stand out.
- Shutter Speed (1/125s or faster): Use a fast shutter speed to avoid blur, especially when your subject is moving or you are shooting handheld.
- ISO (100–800): Keep ISO low in bright light; increase it in darker places to get a clear image.
- White Balance (Auto or Cloudy): Use these settings to keep colors natural and skin tones warm and pleasant.
- Focus Mode (Single-point AF or Eye-AF): Helps keep focus sharp on your subject, especially the eyes.
- Metering Mode (Spot or Center-Weighted): Makes sure your subject’s face is properly exposed, not too dark or too bright.
- Drive Mode (Continuous/Burst): Takes multiple shots quickly so you don’t miss the best moment or expression.
Landscape Photography Settings
For a camera for landscape photography, everything changes. You want maximum sharpness across the entire scene from the foreground to the far horizon. On the other hand, set up your camera like this:
- Aperture (f/8 to f/16): Use a smaller aperture to keep everything in your photo sharp and in focus.
- Shutter Speed (1/60s to 30 seconds): Use a slow shutter for smooth effects like flowing water or moving clouds, and a fast shutter to capture sharp action.
- ISO (100–200): Keep ISO low to get clear, high-quality images with less noise, especially for detailed scenes or large prints.
- White Balance (Daylight or Cloudy): Use these settings to keep colors natural and consistent; avoid Auto for better control.
- Focus Mode (Manual or Single AF): Focus carefully on your subject or a specific point in the scene to keep everything sharp.
- Metering Mode (Evaluative/Matrix): Helps your camera balance light across the whole scene, especially useful in outdoor shots.
- Use a tripod: Keep your camera steady, especially when using slow shutter speeds, so your photos stay sharp.
- Shoot RAW: Saves more image details so you can edit and improve your photos later without losing quality.
Best Lens for Portrait Photography
The lens you choose shapes everything about your portraits: the compression, the background blur, and how flattering the image looks on your subject. Most importantly, for portrait photography, focal length matters more than most people realize. The 50mm lens is often called the ‘nifty fifty’ because it mimics natural human vision. It’s versatile, affordable, and sharp. The 85mm lens is the true portrait sweet spot; it creates a flattering compression that makes faces look natural without distortion. Many pros consider it the best focal length for headshots and close-up portraits.
For tighter close-ups and detail shots, a 105mm or 135mm lens gives you a beautiful working distance without crowding your subject. Wide apertures like f/1.4 and f/1.8 on any of these focal lengths deliver the creamy bokeh that defines the portrait look. Prime lenses with fixed focal length are generally sharper and optically superior to zooms for this kind of work.
Best Lens for Landscape Photography
Landscape photography rewards wide-angle lenses. The wider the field of view, the more of the world you can fit into a single frame. Wide-angle lenses also exaggerate depth, making foregrounds feel dramatic and skies feel vast. For example, a 14mm to 24mm lens is ideal for extreme wide-angle shots, think massive sky coverage, sweeping valleys, and dramatic seascapes. The 24mm to 35mm range is more versatile and works brilliantly for environmental storytelling without too much distortion.
For telephoto landscape work compressing distant mountains or isolating a detail in a vast scene a 70–200mm zoom lens is excellent. Optical sharpness across the entire frame matters enormously in landscapes. Look for lenses with low chromatic aberration and strong corner sharpness. Sigma’s Art and Contemporary series consistently deliver this level of performance at a fair price point.
Sigma Lens Recommendations for Portrait and Landscape Photography
If you want lenses that punch well above their price, Sigma is a name that keeps coming up and for good reason. Indeed, Sigma’s Art series lenses are benchmarked against the world’s best and consistently deliver results that rival far more expensive options.
For portrait photography, the Sigma 85mm f/1.4 DG DN Art is outstanding. It’s razor-sharp wide open and produces the kind of rich bokeh that makes portraits feel professional and emotive. The Sigma 50mm f/1.4 DG GN Art is equally impressive, a workhorse lens that’s at home in any studio or on any street.
For landscape photography, the Sigma 14-24mm f/2.8 DG DN Art is a go-to wide-angle zoom. It’s sharp from corner to corner and handles flare beautifully. The Sigma 16-28mm f/2.8 DG DN Contemporary gives an impressive ultra-wide perspective. It is perfect for capturing landscapes, architecture, and travel photography because of its ultra-wide field of view. It’s also great for vlogging and group shots, where you need to fit more into the frame with sharp detail. All Sigma lenses are available in Pakistan through Sigma Pakistan and all its trusted local dealers.
Common Mistakes When Choosing Orientation
Even skilled photographers make orientation mistakes. Knowing what to avoid saves you from wasted shots and missed moments. For instance, here are the most common errors to watch for:
- Don’t shoot everything horizontally. Tall subjects, people, and social media content almost always look better in vertical framing.
- Think about where your photo will live before you shoot. Instagram needs vertical. Websites need horizontal. Print has its own rules.
- Empty space around your subject weakens the shot. Move closer or zoom in until the subject fills the frame with purpose.
- Avoid squeezing four or more people into a vertical frame. Group shots need horizontal space so everyone fits comfortably.
- Tall buildings, doorways, and stairways get cut off in horizontal frames. Rotate your camera and let the height do the work.
- When you switch orientation, your settings need to change too. Adjust your aperture, ISO, and focus mode to match the new style.
- Wide-angle lenses distort facial features and make portraits look unflattering. Always match your focal length to your subject.
Final Thoughts
Photography is a language. And orientation is one of its most powerful words. Choosing between landscape vs portrait isn’t just a technical decision it’s a creative one. It changes how people feel when they look at your image. Ultimately, the more intentional you are about framing, the stronger your photography becomes. Pair the right orientation with the right settings and the right lens, and the results speak for themselves.
If you’re ready to take your photography seriously, start with your gear. Sigma lenses are built for photographers who demand quality without compromise. Whether you’re capturing landscape images of Pakistan’s northern mountains or shooting intimate portraits in a studio, there’s a Sigma lens designed to help you do it beautifully.
Frequently Asked Questions
What is the difference between portrait and landscape photography?
Portrait photography focuses on people or subjects, highlighting expressions, emotions, and details. Landscape photography captures wide outdoor scenes like mountains, cities, or nature. Portraits use vertical framing and background blur, while landscapes use horizontal framing and deep focus. Both styles differ in purpose, composition, and lens choice.
Which is better portrait or landscape photography?
Neither portrait nor landscape photography is better. It depends on your purpose and subject. Portrait photography is ideal for capturing people and emotions, while landscape photography is best for wide scenic views. Choose portrait for storytelling through subjects and landscape for capturing environments, nature, and expansive scenes.
When should you use portrait vs landscape?
Use portrait mode when photographing people, products, or vertical subjects like buildings. It highlights the subject and minimizes distractions. Use landscape mode for wide scenes such as nature, architecture, or group shots. Landscape framing captures more details horizontally, making it ideal for storytelling through environments.
What lens is best for portrait photography?
The best lens for portrait photography is typically an 85mm or 50mm prime lens. These lenses create natural perspective and strong background blur (bokeh). They help isolate the subject and enhance facial features. Wide aperture lenses like f/1.8 or f/1.4 are preferred for professional portrait results.
What settings are best for landscape photography?
For landscape photography, use a small aperture like f/8 to f/11 for sharpness and depth. Keep ISO low (100–200) for better image quality. Use a tripod and slower shutter speed if needed. Focus on capturing detail across the entire scene with proper exposure and balanced lighting.